How to make organic soap?
A natural soap made with only organic ingredients like coconut oil, palm oil, etc. that effectively softens and heals the skin. Organic soaps are readily available, but you can also make your own soap at home as long as you have the necessary tools and materials. The whole process requires patience and a little bit of experimentation, figuring out the right ratios of the various added ingredients. Once you understand and master the basics of homemade soap, you can experiment with other organic ingredients to make a wide variety of soaps.
material
60g food grade lye (sodium hydroxide)
130ml distilled water
350ml olive oil
44ml castor oil
74ml melted coconut oil
15ml essential oil of your choice
Makes 4 bars of soap
step
part 1
Mixing lye and oil
1 Use a kitchen scale to accurately measure the materials to be used. The ingredient quantities must be accurate to make soap successfully. Some materials are weighed inaccurately and can get so badly proportioned that the soap won’t cure. If you don’t have a kitchen scale, buy one in the kitchenware or homewares section of your local department store or order one on a major retailer’s website. Containers, utensils, molds, or pitchers used to measure or make soap can no longer be used for food. Lye is not edible, and containers that have been in contact with it are not safe.
2 Wear protective clothing when handling lye. Lye is corrosive, avoid contact with skin or near the face. When handling lye, long sleeves, gloves, and goggles must be worn to protect the skin. Open windows or fans to allow air to circulate to avoid inhaling fumes. If you have breathing problems or are concerned about accidentally inhaling lye fumes, wear a face shield. You can buy face shields at your local hardware store or on the websites of major retailers.
3 Pour 130 ml of distilled water into a stainless steel pitcher. If you don’t have a stainless steel pitcher at home, you can also use a durable plastic pitcher. Do not use aluminum water cans, lye will react adversely with aluminum.
4 Mix 60 grams of food-grade lye into a pitcher of distilled water. Pour the lye into the pitcher slowly without splashing. Stir with a silicone spatula as you pour, stirring until the lye dissolves. Pour the lye into water, not the other way around. Pouring water directly into the lye can cause a premature chemical reaction that heats the lye.
5 Allow the base solution to cool for 30-40 minutes. Use caution when handling or transferring alkaline solutions. The naturally occurring chemical reaction between lye and water is exothermic. When lye is mixed with water, the temperature can be as high as 93 degrees Celsius. Even after waiting for a while, the solution was still quite hot, between 38-43 degrees Celsius.
6 Heat the coconut oil in a double boiler and let it melt from solid to liquid. Stir over low heat to prevent it from bubbling or burning. Turn off the flame when it has completely melted into a liquid. Babassu palm oil is similar to coconut oil, the vegetable oil produced by the babassu palm tree in South America. If you’re allergic to coconut oil or want to try something different, you can substitute an equal amount of babassu oil for coconut oil.
7 Pour all the oil into the second stainless steel pitcher and mix for the soap making next. Pour 350ml olive oil, 44ml castor oil and 74ml melted coconut oil into another stainless steel pitcher. Castor oil helps create lather, olive oil softens and conditions the skin, and coconut oil helps soap harden. Coconut oil can be very hot, so be careful when mixing it with other oils.
part 2
Formulated soap
1 Pour the alkaline solution into the oiled water tank to prepare the soap solution. Pour slowly to avoid spilling the alkaline solution. Both the alkaline solution and the oil are hot, be careful not to burn yourself. The temperature of the oil and base solution should be between 38-43 degrees Celsius. Before mixing the two liquids, measure the temperature with a stainless steel thermometer. If the temperature of the oil is relatively low, heat it in a double boiler to about the same temperature as the alkaline solution.
2 Stir the solution with a stainless steel spoon and mix all ingredients thoroughly. As long as it is a stainless steel spoon, you can use it, preferably a long-handled spoon, which will be more convenient for stirring. Continue stirring gently for 30 seconds to allow the base solution and oil to mix together for a more thorough mixing later. If you don’t have a stainless steel spoon or ladle, you can mix the ingredients gently by hand with an immersion blender without turning the switch on.
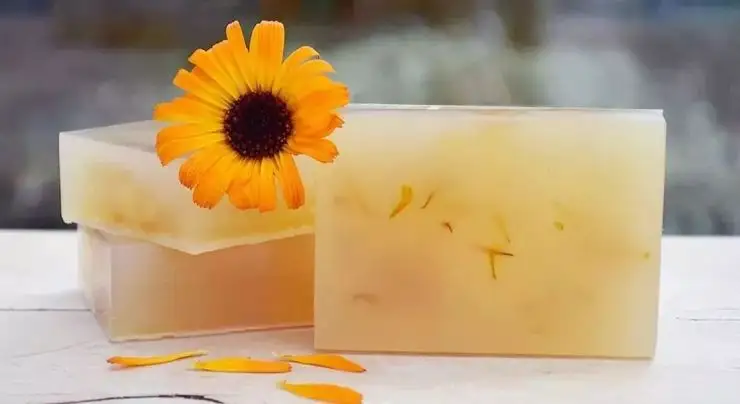
3 Add special clay minerals, sugar, flowers, or herbs to color the soap. Pick the right material according to the color you like. Soaps made from olive oil will have a yellow or cream color when cured. If you like or don’t mind the plain color, there’s no need to add extra materials. Add a little cosmetic clay to change the soap color to pink, green, or white. Add a few drops of milk, cane sugar, or honey to turn the soap a warm caramel color. For a more vibrant color, use the petals or leaves of your favorite flower or herb. For example, vermilion roots give the soap a purple color, and spinach leaves give the soap a green color.
4 Blend with an immersion or hand blender for 1 minute. Turn the switch on only when the blade of the blender is partially immersed in the mixture, otherwise, the mixture will splatter. Rotate the mixer slowly on the bottom of the pitcher to mix the mixture well. If the immersion mixer has multiple speed settings, select the lowest speed. Stirring the mixture at a high speed can cause the soap to create unwanted bubbles. If you don’t have an immersion or hand blender at home, buy one at your local department store or online.
5 Alternate electric and hand blending until soap thickens. Alternating spoons and whisks may spill the soap, and it’s best to alternate between electric and hand blending directly with an immersion blender. Stir alternately for 10-15 minutes. In the soap-making process, when the soap becomes thick, it is called a “trace”. Trace directly translates to “traces”, which means that the soap is thick enough, pick it up with a stirrer and then drip it, there will be clear traces. Once this state is reached, there is no need to stir, and it can be poured into molds.
6 Add essential oils to thick soaps for added fragrance. First, add 15ml (1 tablespoon) of essential oil and mix well with a stainless steel spoon. Adding essential oils to soap will produce a more intense fragrance than adding them to a solidified soap. If the soap isn’t scented enough, add a little at a time until you can smell the scent. Commonly used essential oil scents are vanilla, almond, lavender, citronella, geranium, or peppermint.
part 3
Molding and curing soap
1 Pour the soap liquid into a silicone mold with a side length of 10 cm to let the soap take shape. Use a mold that makes 4 rectangular bars. Standard mold sizes are about 10cm long, 10cm wide and about 8cm high and can be found at your local craft store or major retailer websites. Consider using silicone molds with interesting patterns or shapes to make one-of-a-kind handmade soaps. You can also use a toast mold without partitions and cut the soap into strips later. Do not use muffin molds or baking sheets. Soap will break the muffin mold and won’t make soap.
2 Cover the soap mold with freezer paper and a towel to retain heat. Let it sit like this for at least 24 hours, checking the soap from time to time to make sure it’s not overheated and chapped. If the soap cracks, cover with freezer paper and a towel, but in a cooler place, such as a dark cupboard or cool basement. Use freezer paper instead of regular wax paper, because freezer paper is thicker and wax paper may be melted by hot soapy liquid. You can also use parchment paper.
3 Uncover the freezer paper and towel and allow the soap to harden for another 2-3 days. Check the soap at least once a day to make sure it’s hardening and nothing unusual. The texture of the soap will gradually turn into a gel within 3 days. By day three, the soap should feel fairly firm when touched with your fingers.
4 Continue to cure the soap after demolding. Store the bar out of direct sunlight and let it sit for at least 6-8 weeks. The air will dry out, allowing the soap to cure completely. Then you can use it happily! If the ratio of water to olive oil is high, curing is only required for 4-6 weeks. If you are using a toast mold, carefully cut the soap into 4 equal-sized bars with a knife to cure.
warn
When making organic soap, watch for allergic skin reactions. If you are allergic to a certain material, find a similar substitute. If you find that the prepared soap is irritating your skin, stop using it immediately.
Related Posts:


Copyright 2020, Hebei Guansheng Technology Co.Ltd All Rights Reserved